
Easy Peasy Subway Tile
- Christina Armbrister

- Aug 5, 2021
- 3 min read
I have tiled many times and learned a lot of lessons...some of them very hard ones.
I am your short cut!
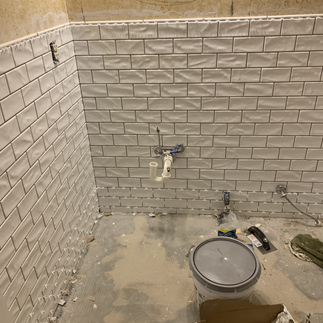
In this bathroom, I installed the subway tile in just one day! The floor tile was a little more complicated, and I will share that, soon.

Tip #1: You need to figure out how much tile you need.
I always add 10% to the total square footage needed, so that I don't run out at the very end. It's crazy frustrating!! I know I've done it. (When you are in the mess of tiling, who wants to run to the store to get more?!)
*Pro-Tip: If you are buying a more expensive specialized tile, you want to make sure when you buy it that it is from the same "lot" when manufactured. The colors could possibly be slightly different.
How to figure square footage. Yeah yeah.... math. Well, I suck at math, but we all know it's width times length (or height). Okay, so if you are measuring in inches, it's a little trickier.
So it goes like this:
width (inches) TIMES height (inches) DIVIDED BY 144
144 is a square foot in inches (12x12)
Sorry if this elementary, but I'm your short cut, remember that!
So, wall #1 is 65"w X 52"h = 3380"/144"= 23.47 sq. ft. of subway tile
- Do this for all walls and don't forget the little skinny part next to the tub or toilet, etc.
Add totals together, then multiply by 1.10 (this adds in an extra 10% for mess-ups, etc.)
Materials
Level (I have a 4-footer and a smaller standard size) *I also have an extra small just in case
Wax Pencil or Sharpie
Spacers (depends on the tile type or your preference. I used 1/8" spacers)
Two 5-gallon Buckets (one for mixing grout and one for clean water for cleaning after grouting)
Ledger board in the width of each wall for floors that are uneven (I'll explain in a minute!)
Sanded Grout (most tile) OR Unsanded Grout (for real stone and polished tile- I used this for the subway wall tile)
Tile Saw (invest in one if you have lots of projects or you can get a Hand Tile Cutter- takes longer but does the trick)
Small Tile Cutter (for tricky small cuts)
Clean towels
Rubber Gloves (for washing excess grout from tile, and saves your fingernails!
Knee Pads (comfort!!)
2. Where to start-- In the center.
Have you seen those rooms where people have tiled and there is just a sliver on the side? Look and see if you notice next time!
With level or unlevel floors, I always start in the center of the wall. Measure the width of the wall. Add up the width of the tiles, and don't forget to add the width of the grout lines.
*Pro-Tip: If the floor is not level, the same thing can happen and have a sliver across the bottom on one side and thicker on the other.
Who wants to look at wonky tile??
3. ***Assume nothing is level***
Walls, counters and especially the floors in a bathroom. All floors for that matter.
- Set a ledger line
- Know how high you want to run the tile
e.g. If it's 54" set your ledger board so that what's beneath the level line will have minimal visible change in size (like the corners, see below)
What is a ledger board?
It's a temporary ledge that is level for the first bottom run of tile.
- Secure to wall in studs with screws (easier to remove than nails from a nail gun)
- After bottom row of tile is set, you can remove ledger board and tile down to the floor
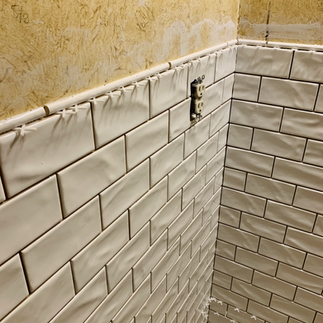
Corners Corners Corners
So important!
The corners, if running a brick pattern, the corner should be an alternating half piece, then the whole piece.
* most of these pieces will be almost the same size but if the corner isn't square then the pieces will get smaller or larger, so cut 3-4 pieces at a time and dry fit just in case you need to do small cut or need a bigger piece. No one likes to mess with a piece of tile with adhesive sticky and messy. Which leads to the next step. Keep a small bucket with towels and clean water. It helps for mini messes.
Tips on Adhesive and Grout
I like pre-mixed Mastic (cleans up easy) and mixing my own grout. The grout needs to be the consistency of cake icing. If you're a rookie, use a grout that is NOT a quick setting grout. It will quickly harden in the bucket. I've done it and I'm a semi-pro.


This post is packed with practical wisdom—especially for anyone diving into DIY bathroom remodeling. From calculating square footage to tile lot consistency, your tips are spot-on and incredibly helpful. It’s amazing how something as simple as subway tile can elevate a space when installed with care and creativity. For those who prefer to leave it to the pros, connecting with Expert bathroom contractors can ensure a flawless finish. Explore trusted options at MyHomeQuote and bring your tile vision to life with confidence.